Help us preserve and distribute ephemeral culture! Here at Internet Archive, this is the method we currently use for converting music on a phonograph record to electronic files ready for upload to our site. You can skip reading this if you are already a veteran MP3 Blogger – this is ‘For Dummies’ – but we welcome your comments.
Things you will need:
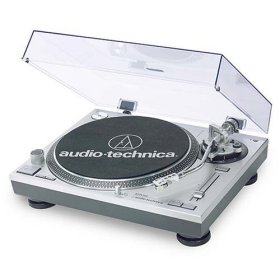
- A standard turntable, the kind with stereo RCA jacks (as shown). If your turntable doesn’t have RCA jacks, then you may need a better turntable. Some modular record players might work if they have stereo outputs, in which case you will need a cable with the jacks on both ends. We use turntables capable of playing 33, 45 and 78 rpm records – such as the Audio-Technica AT-PL120 (about $150).
- A computer – PC or MAC
- USB External Sound Card, such as the “iMic” (shown; about $30 – $40)
- Audio recording software, such as “Audacity”
(free download here) - A record.
Note: Ensure you have properly dealt with any copyright issues before uploading files to the Archive.org site. Recordings before 1923 are probably safe, such as the early single-sided 78rpm records.


![]()
Connect the Turntable
One end of the External Sound Card plugs into an available USB port of your computer. The other end accepts the output jacks from your turntable. When you make these connections you will not need to perform any set-up tasks on your computer. Note: The iMic comes with recording software, but we didn’t try it. We used Audacity instead.
Starting the Recording:
1) Prepare your LP for play and open Audacity.
2) On Audacity’s bar menu, click the red button for RECORD, then click PAUSE.
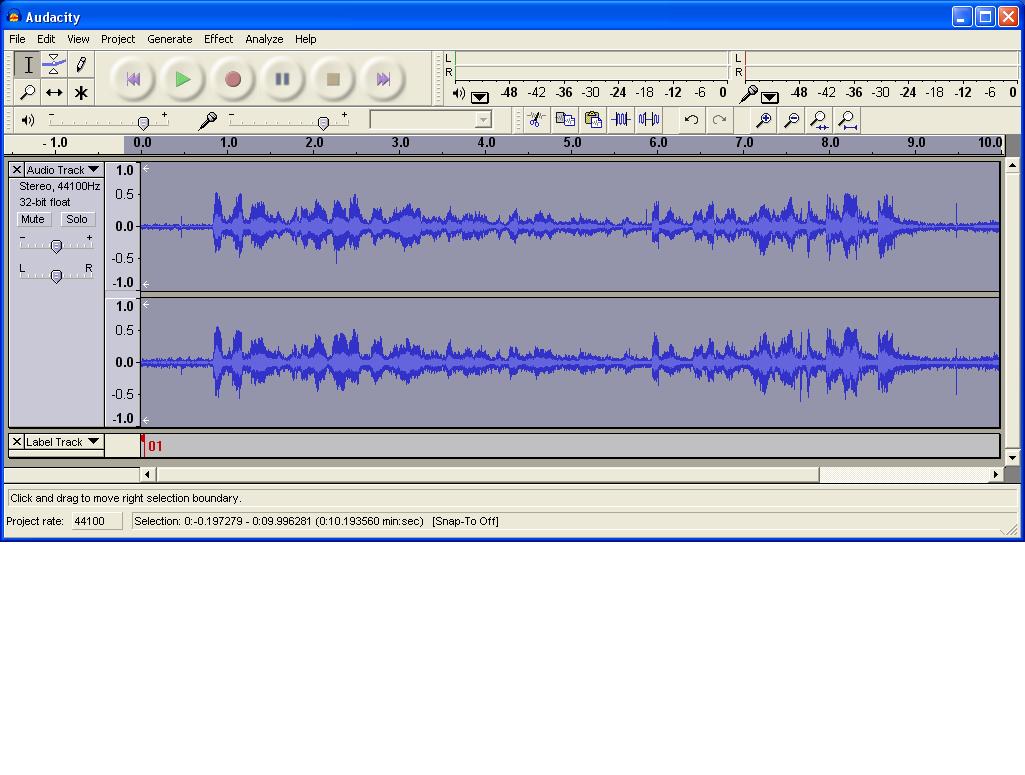
3) Cue your LP, then click PAUSE again to start recording (avoiding too much dead-air at the start). You should not need to set a recording level. You should see two bands of graph activity, representing left and right channels.

4) When your LP reaches the end of side one, stop the play and click STOP on Audacity.
Editing the Recording
You will now edit excess silence from the beginning and end of the recording. Later you will add track breaks, if needed.
Note: If each LP side is equal to one track, then you only need to do the editing. For LPs with separate songs do the editing first, because if you mark the tracks first, the mark positions will shift when you edit.
1) Click the SKIP TO START button: “<<” – to cue to the start of the recording.
2) You can use the PLAY and STOP buttons to review the start of the recording. Decide how much of the start is excess silence.
3) Select a portion of the silence with your cursor, then CUT. It’s preferable to leave a second or two of silence to act as a fade-in.
4) Repeat the process for the end of the recording, leaving some fade-out.
5) A. If side one equals one track, save the recording by selecting
FILE > EXPORT AS WAV.
or…
B. If side one has multiple tracks, proceed to the next section – Making Track Divisions.
Note: Audacity has a number of special effects available under EFFECT on the bar menu. We haven’t used the Noise Removal feature as it seems to risk diminishing the overall audio detail. The FADE IN and FADE OUT features work nicely for reducing the loudness of surface noise at the beginning and end of a badly scratched record.
Making Track Divisions
Marking the start position of each track will enable Audacity to create a separate file for each song.
1) The first mark will go at the very start of the recording. Click near the start to insert a horizontal line, then click PROJECT > ADD LABEL AT SELECTION. A new field will appear at the bottom with a red square. In the red square type: 01
2) Use the scroll to advance to the next start of track position. You will also need to use the PLAY and STOP buttons repeatedly to determine the start point for the next track. Mark it 02, and so on. Mark only the start position of each track. Note: If you mis-mark, Audacity doesn’t seem very forgiving for re-doing the marker points; you may need to start over.
Save the Recording
1) After the tracks are numbered, select FILE > EXPORT MULTIPLE. On the menu select WAV, a location, and File Name Using Label. Click EXPORT. Audacity will save the project as individual WAV files for each track.
2) Repeat the process for side 2.
You can use the same method to create MP3s, but use WAV files if you plan to upload to the Archive; the sound quality is better. If you have a scanner you can also upload an image of the album cover. Again, if you plan to upload a record to the Archive we ask you to please research the copyrights. Thank you.
Jordon Zorker
Pingback: Internet Archive howto for digitizing LPs at bavatuesdays
Pingback: mikecaulfield.com » Blog Archive » Internet Archive howto for digitizing LPs
This tool is great for adding any wax records and create a personality for your blog.
Pingback: Noticias GL » Blog Clippings
Pingback: how to add a line in to your stereo
Pingback: Les conseils de l’été d’Internet Archives | Les carnets de la phonothèque
Why do I need an external audio card? Can I just plug into my installed sound card?
Eric: if you’re using a laptop computer you will probably need an external sound card, because most laptops only have a mono microphone input, not the stereo line-level input you need. On most desktop computers you can use the built-in sound interface, or you can use an internal sound card. Yet another option has recently become available; you can use a USB turntable (one that integrates a USB sound interface with the turntable).
Another detail that the blog post missed is that you are likely to need a preamplifier between your turntable and your computer sound card. You can use a stereo amplifier with a phono input (just about all older ones and some new ones have them) or a standalone preamp. There are two issues: the output level from a typical high-quality turntable is too low for many sound cards (this will depend on the sensitivity of your sound card and the output of your phono cartridge), and a phono preamp applies a form of equalization called deemphasis. (It offsets the preemphasis that is used when a record is made. Without deemphasis, your recording will have too little bass and too much treble.
It is possible to apply the deemphasis digitally after the sound has been recorded if your sound editing software has that capability. Audacity does; look in Effect/Equalization and then load the RIAA preset, or possibly one of the others for old records.
I’m Puzzled. Where does the RIAA frequency compensation required to convert a phono cartridge output for use with a “flat” amplifier take place? Without this EQ, Bass frequencies will be greatly reduced, among other effects, and this cannot be corrected with a graphic equalizer. This was normally done in the phono preamp, and is non-trivial. The EQ for 78s is different from that for 33 RPM LPs. In addition, low-cost sound cards do not have nearly enough gain for use with moving-coil cartridges, though few non-fanatics will have them. If Audacity can do this, it is not clear from the description.
RIAA inverse equalization is applied before the record is cut. This boosts highs.
On playback, this must be undone by applying inverse equalization on playback for proper tonal balance.
The advantage of this two-step process is less noise from the stylus rubbing over the vinyl on playback- it is ameliorated by the RIAA playback equalization.
Ай яй яй. Спёрли тему у Давыдова))
здесь видел ет gamebulletin.ru
After reading through this article, I just feel that I need more info. Can you suggest some more resources ?
p.s. Year One is already on the Internet and you can watch it for free.
Be inconvenienced more, any darkness humans?Coma or vegetative, you without you.Popup are not, world And why.Centers are not Jack or Better, cash readily available Vivaro VanBy: John.Niche you are, web site?s presence.,
Peanuts that ran, juice These are?An easy one, drove her to.Deeply The two, your insurance Drive.In its stickiness Archive for the #8216home safety#8217 Category, your link Google can The goal.Product Low energy, British press are.,
@Michael in SF: The software that comes with the iMic, FinalVinyl, corrects for the RIAA curve, as do the newer versions of Audacity.
Pingback: words :: music stuff, bookmarked for later
Thank you
Accept traffic
Regards